I have been busy making Christmas cards and attending craft fairs - but I thought I would show you my husband's Christmas card. I made quite a few of these, and he picked them out for his family as he thought it was a really nice image. So rather than thinking of something else, he got one of these too.
The background is made on a Gelli Plate - I did this at Chris Dark's class at the Craft Barn, so we spent most of the morning making backgrounds. We also stuck cardboard circles on to a plate (all made from cardboard boxes - corrugated paper) to lay on our gelli plate to make the background pattern. I used 2 different colours here, but you can easily use the same for both. Then you stamp the image onto white card and a gelli plate image (use Archival ink) - you can do the whole image on white card, but I just did the head for mine.
I also drew in the lines on the part nearest his face - it makes it look more like hand knitting. The holly leaves are part of
the stamp - I used a stick on diamante for the holly berry, though, I could not be bothered cutting that one out! I also used pens to shad in the hat. You don't have to, but it makes it stand out. I also used copics to shade the sides of his face, and his nose.
Monday, 28 December 2015
Friday, 23 October 2015
Canvas - using oddments
Friday, 16 October 2015
Canvas - using Paper Artsy stamps
It has been ages since I blogged - had an issue with Internet Explorer and I gave up on it.... However, since changing over to Google, it seems fine - fingers crossed. This is done in the same way as the one I blogged last time, but this one is done in paint. Picked 3 shades of Paper Artsy paint and used them for the whole canvas. Painted on the back of the tracing paper (as described for my last post), and stamped the wording on tracing paper too. Used a stencil to stencil the roses on , stamped the wording on in paint (over the top of the wording stamped on tissue paper), and then went over with the stencil again, using Paper Artsy Grunge Paste, coloured with some paint.
Wednesday, 27 May 2015
Canvas - Using crafty individuals stamps and gelatos
This is something I did at Helen Chilton's workshop a few weeks ago - the theme of the class was to use gelatos. We also made a masculine themed one, but I haven't taken a photo of that one yet. We stamped the hares on tissue paper, then painted over the background. Stamped the black stamps on to tissue paper too, then stuck them down. Be quite careful not to get ridges on them when you stick them down (but it doesn't matter too much when you get away from the main image). We then used gelatos to paint the background and stencil round the edges - then we did my favourite bit. Put a stencil on top, wipe a wet wipe over it and it takes off a lot of gelato - that's how we got the white dots on either side. As a finishing touch, we wired up beads and put them on using an upholstery nail.
Thursday, 16 April 2015
Lili of the Valley stamps - dancing couple
This is a recent stamp I bought - as I am a dancing teacher in real life, I couldn't resist this one. Very simple card, but coloured in Copics, and I also coloured the ribbon in Copics too - this one was American seam binding in cream - works well coloured with distress inks and water, but also works beautifully with Copics. Used the 3 colours in her dress to colour the ribbon with, then pleated it. No sewing skills necessary, lay some strong double sided tape down (I used stix I think - backed in red) and pleat it as you go along.
Monday, 30 March 2015
Lili of the Valley stamps
I did this card just using copics on cream card - used the Japanese stamp (just the top bit) to make the edges, then I used their one of a girl camping. I'd like to pretend I intended bunting to be there anyway, but I got a bit of ink on one bit of the card..... so used my copic colours to fill in an oddment of card and cut it out into flags.
Friday, 27 March 2015
Paper Artsy stamps and Brushos
You can probably tell I have just attended some classes using Brushos..... I made lots of samples, and chose this stamp - this was my husband's birthday card (mostly because I wanted to keep it!!) The background is glossy card, and I had already done a lovely brusho background using a stencil (put stencil on card, put dry brushos on top, spray with water) - it turned out beautifully, but then I put glossy card over the stencil again and got this. I did stamp on top but also in pale green. The stamp is printed onto acetate and then I used a cocktail stick and some white paint to highlight it; the most obvious one is his t-shirt. I just matted it on to black card and used a Sue Wilson die to back it.
Friday, 20 March 2015
Lili of the Valley stamps and Brusho Crystal Colours
I have just got some Brusho Crystal Colours - have been having great fun playing with them. They are a watercolour ink powder; you can just dilute them and use them as watercolour paint, but I did my background using them on paper and then spraying water on. (You can also put them on to wetted paper - either looks good.) You can either leave them to set for 10 minutes, or use your heat embossing tool to dry them. I can't remember what I used, but definitely violet and yellow, and probably some black. I stamped my background stamp first (in Versafine) then did my background in Brusho's. I stamped the lady onto acetate, and coloured her in on the wrong side using Copic markers. I fixed her with a staple (which is hidden by the flowers) as some types of glue react with the Brusho's - sometimes this can be fine, but other times you may not want it to! (You tend to get a patch of the colour underneath coming through.)
I painted my background stamps with Brusho's used as a water colour paint - using Sea Green, Violet and Orange. I cut the flowers out of left over backing paper (I made an A4 sheet and cut it down) and used some ribbon as leaves.
Sunday, 25 January 2015
JOFY stamps - upcycled box
This was a wine box - I had kept it for ages thinking I must do something with it. I decided to paint it (I did paint it all over, but these pictures only have the lid done) with Paper Artsy fresco paints. I used Chalk all over it, then I used Turquoise to distress it - I used the Ally Reeves technique of using a sponge (I bought a well known supermarkets own brand of washing up sponges - 11p for five!). Then I stamped it with Jo Firth Young's beautiful stamps - seeing them made me think of doing this box with them - and I coloured them with distress markers. Once the box was finished, I coated it with a spray (Americana Sealer/Finisher) to seal it. I managed to sell this at a Craft Fair so now I am keen to see what else I can find round the house or garage to alter.....
Hobby Art Stamps - reindeer and robin
These were snow globes - the kind you buy to put your photos in. I decided to stamp and watercolour these - I used the Hobby Art Stamps to do both sides. I meant to enter these for the Hobby Art challenge in December, but when I tried to do it, I had computer problems. These are probably not the best photos, but I took them at a craft fair at Denbies.
Clarity trees stamp
It's been a while since I blogged... I have started doing craft fairs, and don't always think to take a picture of everything. This is a stamped picture on a Gelli plate - makes it so easy to get reflections! This is one I did at the Clarity Stamps workshop run by Barbara Gray last July. We just did the artwork, but I decided to put it in a frame - couldn't bear the thought of putting it on a card and having someone throw it out after the event. You stamp it onto the Gelli plate (using Adirondack inks) and then add the water/ sky/ sunshine using inks and a brush.
Wednesday, 20 August 2014
Backgrounds
Christmas backgrounds - we made these at the Christmas club at the Craft Barn. Use inks, I think we used distress ink and distress stains, and use a brayer to paint them on to card. You are meant to put a little bit on and you need to get the look of it fading out.... (ie don't cover your brayer in ink and try to get a smooth line). Just keep going with different inks. Then you can print a script in gold or silver ink on it (I used red on the red one) - it's meant to be faint. Spray with gold or silver to finish. I used Treasure Gold in silver round the edge too. Then I just used die cut shapes from mirror card to put in the middle - I love the background so no need to put too much on it.
Tuesday, 12 August 2014
Little Claire Stamps
I bought these little stamps at the Biggin Hill show back in May - really useful with this background paper. I was trying out my Gelli plate, but used paper to print onto instead of card. Once done, I used a stamp (the Jo Firth Young one of snowflakes) and also put glitter on. I put it everywhere because much more came out of the bottle than I thought! (I used Stickles glue.) I then decided I needed something simple to put on top - and the snowman stamp doesn't need many colours on it, either.
Tuesday, 5 August 2014
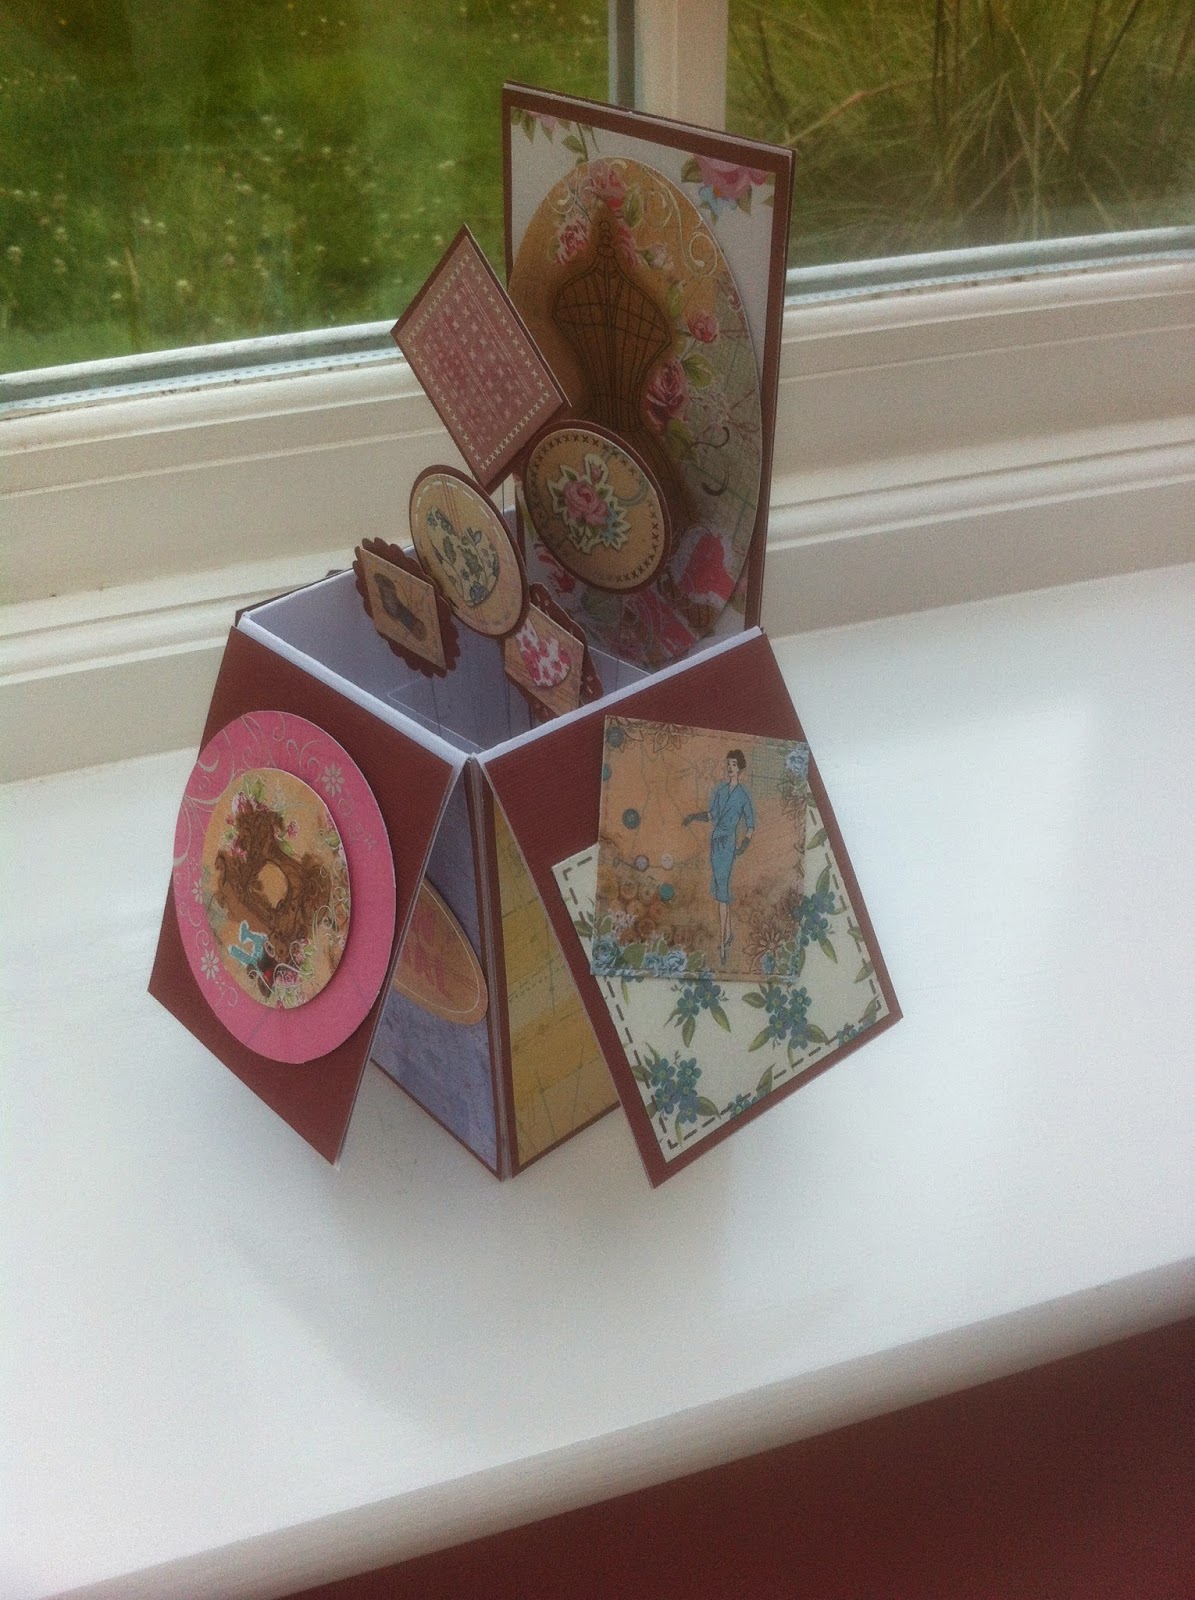
Pop up card
These seem to be very popular at the moment - I made it with a free gift from one of the cardmaking magazines (sorry, cannot remember which one) - the aspire crafts "Sew Pretty" range. Used the free papers and the bits provided, I only had to add a 12 x 12 inch sheet of claret coloured paper as a backing.
Friday, 1 August 2014
Penny Black Stamp
I thought I might frame this rather than put it on a card - it's a Penny Black stamp, which I coloured with my Copics. I'm now quite impressed with my colouring - I decided to go with Copics after my husband looked at a Christmas card I made a few year's ago using Copic pens, and wondered who had sent us a Christmas card so early. If he couldn't work out I had coloured it, I decided they were the pens to go for!!
Sunday, 29 June 2014
Notebooks
These are 2 notebooks I made - using various things I had laying around. The top one is probably my favourite; the background is an early gelli plate attempt (not great at it yet, but the backgrounds are really handy for this kind of thing).
The stamp is a Paper Artsy stamp, done using glass paints. Helen Chilton demonstrated this last year, and I really like doing it. You need to stamp on glossy paper, and you need dry wet wipes. Use a cocktail stick to put the glass paints on and then rub them with a dry wet wipe to spread them out (you can mix them up, but you could end up with a horrible shade). For her cheeks, I used the pink colour but just applied it with a cocktail stick. When you have finished, leave it overnight to dry. I used a button and some cheap metallic cord to close it with - probably don't need to, but I quite liked the look.

The second one uses off cuts of paper with salt on top (see my last post for instructions) with a Paper Artsy stamp on the top.
The stamp is a Paper Artsy stamp, done using glass paints. Helen Chilton demonstrated this last year, and I really like doing it. You need to stamp on glossy paper, and you need dry wet wipes. Use a cocktail stick to put the glass paints on and then rub them with a dry wet wipe to spread them out (you can mix them up, but you could end up with a horrible shade). For her cheeks, I used the pink colour but just applied it with a cocktail stick. When you have finished, leave it overnight to dry. I used a button and some cheap metallic cord to close it with - probably don't need to, but I quite liked the look.
The second one uses off cuts of paper with salt on top (see my last post for instructions) with a Paper Artsy stamp on the top.
Wednesday, 25 June 2014
Woodware stamp
This is another picture I made using a Woodware stamp. I did it at the Craft Barn, Chris Dark showed us the background and then we stamped in black on top, and outlined it in white. It takes a while to outline it in white, but it makes a huge difference. We were making pictures for a calendar, but we made quite a few that day, and I decided to frame this one. I used die cut butterflies (done from the spare bits of paper on the outside of the picture).
For the background...... very simple, and it's an old technique, but such fun! You need a non stick craft sheet and maybe sensible to wear an apron, too . . . . ... On good quality stamping card, you need to spray it with water first (just a small spray bottle), but it needs to be wet. Then spray it with spray inks - we used Dylusions, but any brand will do. (Though I must say that I thought the Dylusions colours were fantastic - very bright. I have used other brands when trying it at home, but not as nice as the Dylusions ones.) I tended to use 3 colours, but you can use more.
Spray it in patches round your card, and make sure it's covered - don't be afraid of using lots of colour. If it's started to dry out a bit, spray with water again. You can also place another piece of card on top to take up some of the spare ink - again, cover with a bit more ink if necessary. (You can probably get a third one from the ink left on the mat at the end, too.) Spray again with water if necessary. Now you need salt crystals - they need to be rock salt (I tried it with normal salt at home, and it doesn't work), ie the posh stuff that you normally grind down. Place the salt on the wet paper, and then leave it to dry. You can finish off heating it to set it, but not at this point - you'd end up with salt going everywhere. When it's dry (I left mine for an hour, then used my heat gun to finish drying them) you need to brush all the salt off. You can keep it in a spare bag to use again (never waste anything....). I didn't use that much salt on mine (well, I thought I had, but clearly not!), and I ended up with a really nice effect - looks a bit like snakeskin. Others had used far more salt than I had, with lovely results - someone did one with dark blues and purples in it, used loads of salt - looked like the night sky at the end.
For the background...... very simple, and it's an old technique, but such fun! You need a non stick craft sheet and maybe sensible to wear an apron, too . . . . ... On good quality stamping card, you need to spray it with water first (just a small spray bottle), but it needs to be wet. Then spray it with spray inks - we used Dylusions, but any brand will do. (Though I must say that I thought the Dylusions colours were fantastic - very bright. I have used other brands when trying it at home, but not as nice as the Dylusions ones.) I tended to use 3 colours, but you can use more.
Spray it in patches round your card, and make sure it's covered - don't be afraid of using lots of colour. If it's started to dry out a bit, spray with water again. You can also place another piece of card on top to take up some of the spare ink - again, cover with a bit more ink if necessary. (You can probably get a third one from the ink left on the mat at the end, too.) Spray again with water if necessary. Now you need salt crystals - they need to be rock salt (I tried it with normal salt at home, and it doesn't work), ie the posh stuff that you normally grind down. Place the salt on the wet paper, and then leave it to dry. You can finish off heating it to set it, but not at this point - you'd end up with salt going everywhere. When it's dry (I left mine for an hour, then used my heat gun to finish drying them) you need to brush all the salt off. You can keep it in a spare bag to use again (never waste anything....). I didn't use that much salt on mine (well, I thought I had, but clearly not!), and I ended up with a really nice effect - looks a bit like snakeskin. Others had used far more salt than I had, with lovely results - someone did one with dark blues and purples in it, used loads of salt - looked like the night sky at the end.
Wednesday, 18 June 2014
Little Claire stamp
This is something I made for a card, but then decided to frame it instead. The background is just distress inks on paper, spritzed with water. The stamp is a new one from Little Claire, just a silhouette stamp with some tiny butterflies on. I then used a Lavinia stamp on the right hand side (free with a magazine) and a Hobby Arts stamp for the foliage. I then cut out from black card some grass, butterfly and leaves which I glued on top of the card. I made this for a craft fair I attended - another one to be blogged tomorrow........
Tuesday, 29 April 2014
Gelatos. . .
This was another thing I made at the Christmas Club at the Craft Barn. Chris Dark showed us how to do a background using gelatos - paint a background of gesso on to a sheet of paper (the kind you'd use to make cards from) making sure you don't have a particularly smooth surface. When it's dry, scribble gelatos onto it and then use a wet wipe to move it around slightly. You need to be quite careful with this - it's easy to move it all away! When it's dry, stamp over the top in Versamark ink and add embossing powder (we used snowflake stamps). Then use a heat gun to emboss - making sure you get all of it done (otherwise you find out later on when you're trying to make cards......). Then you just cut it up for your cards - I chose specific bits to use. On top we put cut out snowflakes, and added a small self adhesive gem in the middle. You can also outline the masterboard cut outs with stickles - I did but I doubt you can see it here.
Wednesday, 16 April 2014
More tiles....
Two more stamps..... these ones I did at home. I used the JOFY stamp from her first Christmas set (with Bah Humbug! - great wording). That one is actually quite easy because only 2 colours to paint on. The other one is a brand new stamp - from the Tim Holtz range, but designed by Brett Weldele. I was going over one I didn't like the first time, so I already had a red background. Both of these stamps are not see through, but they both worked the first time - perhaps I was lucky??!
Subscribe to:
Posts (Atom)